Perhaps I can put together a script that deletes these annoying shortcuts...
Friday, June 28, 2013
RANT: Google Chrome Enterprise Installer Desktop Shortcut
Up to this point, I've found Google Chrome to be a great browser. But, I just installed the Enterprise version of Chrome to give the application to all users. To my chagrin, I found that it also forces a shortcut on the desktop and taskbar for all new users. There doesn't seem to be a way to stop those shortcuts from getting created for all new users of the computer. Hey Google, stop trying to be like Microsoft pushing IE down our throats. Not everyone wants to have Google Chrome shortcuts plastered every where.

Tuesday, June 25, 2013
TIPS & TRICKS: Slow Wake for MacBook Pro
Apparently, Apple notebooks have a standby mode that is a deeper sleep than the standard sleep that happens when you first close the lid. This standby mode kicks in after an hour of normal sleep by default to help save battery power. Good feature to really help save battery drain while the computer is sleeping.
However, there is a draw back. It takes about 10 to 15 seconds after the lid is open before a password can be entered. If I'm a hurry, 10 to 15 seconds seems like an eternity.
Fortunately, there's a way to adjust this behavior. Here's the command to use in terminal:
sudo pmset -a standbydelay 86400
The 86400 is the number seconds in 24 hours. This can be adjusted to what ever works for you. To check the setting:
pmset -g
See the following blog for additional information:
Hope this helps you.
Saturday, June 22, 2013
TIPS & TRICKS: Microsoft Office Activation
In the office we use Volume Licensed installations of Microsoft Office. Each installation "phones home" every so often to extend the activation period. When Office "phones home" it talks to a KMS (Key Management Services) server, which grants additional time when it's a valid installation.
A second way to activate Microsoft Office is through a MAK (Multiple Activation Key), which has a predefined number of activations. This method is for machines that are not able to talk to a KMS server within a specified period of time.
Finally, there are retail versions that have unique codes for each installation or a unique code for a small number of installations within a household, usually 3 installations.
My problem was how to see which one of the above methods a particular installation is using, since the information in the Help menu does not give that information. Fortunately, there is a command line tool that will give that information:
This command needs to be run inside the Officex, where x is the number that corresponds with your version of Microsoft Office (i.e. Office14 for Microsoft Office 2010). The Officex folder is found in Program Files (x86)\Microsoft Office or Program Files\Microsoft Office depending if you're running the 32-bit or 64-bit version of Office.
In addition, there's a command to tell Office to activate or renew remaining grace period:
Side note: For installations of Microsoft Office away from your corporate environment, you'll likely need some sort of secured connection (i.e. VPN) back to the office to use the activation/renewal command.
A second way to activate Microsoft Office is through a MAK (Multiple Activation Key), which has a predefined number of activations. This method is for machines that are not able to talk to a KMS server within a specified period of time.
Finally, there are retail versions that have unique codes for each installation or a unique code for a small number of installations within a household, usually 3 installations.
My problem was how to see which one of the above methods a particular installation is using, since the information in the Help menu does not give that information. Fortunately, there is a command line tool that will give that information:
cscript ospp.vbs /dstatus
This command needs to be run inside the Officex, where x is the number that corresponds with your version of Microsoft Office (i.e. Office14 for Microsoft Office 2010). The Officex folder is found in Program Files (x86)\Microsoft Office or Program Files\Microsoft Office depending if you're running the 32-bit or 64-bit version of Office.
In addition, there's a command to tell Office to activate or renew remaining grace period:
cscript ospp.vbs /act
Side note: For installations of Microsoft Office away from your corporate environment, you'll likely need some sort of secured connection (i.e. VPN) back to the office to use the activation/renewal command.
Thursday, June 20, 2013
Printing to Adobe PDF in Firefox
Synopsis: User tries to take a webpage in Firefox 21.0 and convert it to a PDF file using Adobe Acrobat X, version 10.1.7. Going up to File > Print and selecting Adobe PDF works fine. The problem occurs after the print dialog box comes up, the Adobe PDF printer is chosen and the print button is clicked. Sometimes you get the window to choose the location to save the resulting file. But, the end result is a freeze of the Printing progress bar, which leads only to force quitting Firefox:
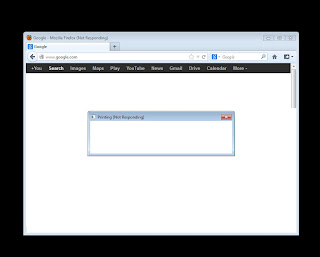


Sometimes after force quitting Firefox, this Creating Adobe PDF window comes up on the screen and just sits there:

Only thing I can do with this window is close it out without any further incident.
Troubleshooting steps:
- Reloaded Firefox
- Reloaded Adobe Acrobat
- Ran Firefox in Safe Mode
- Attempted to close out problematic processes just before printing
- Tested with different Windows users profiles on the same machine
all without success. The problem could be reproduced with Microsoft XPS virtual printer as well. Found a forum post that explained the problem in a bit more detail:
The article references Firefox 15 with a link to another forum post about even older versions of Firefox. But, the symptoms are pretty much identical. Basically, Firefox has trouble handling calls to Windows File common dialog, which should be pretty routine. Of course, this problem doesn't occur in IE or Chrome. Hopefully, I'll have some updates at some point down the road (i.e. Firefox fixed the problem with an update). For now, I have suggested to the user to try a non-Adobe PDF creator in the form of a Firefox plug-in or try to use a different browser if he anticipates he needs to create a PDF from a webpage.
Friday, June 07, 2013
TIPS & TRICKS: Make Sure 'Display Name' Is Populated
Learned something new today about Exchange. Apparently, the Display Name field holds much more significance than I originally thought. When searching for users to create a new profile (i.e. hitting Check Name) in Outlook setup, it actually relies on the Display Name field to find the appropriate user in the Global Address List. I used to think that giving it the correct username was enough.
In the future, I will make sure to have Display Name filled out appropriately and not leave it blank.

In the future, I will make sure to have Display Name filled out appropriately and not leave it blank.

Friday, May 10, 2013
TIPS & TRICKS: Enterprise-Level Networking
I deal, mostly, with consumer level equipment for helping home and small-office users get connected. Most situations don't call for spending more money than consumer-level hardware costs to get together a suitable networking situation.
However, even home and small-office users, sometimes have very specific situations that require some higher quality equipment that provide specific functionality. Case in point, I once tried to help someone setup a wireless network in a 2500+ square foot home. I had recommended using Apple equipment, since they were mostly a Mac household and the Airport-branded equipment provided most of what they need. My lesson learned from this project was that the Airport Extreme can only accept one additional Airport Express as an extender to the wireless network. Most of the house had coverage after I put in the Airport Extreme and couple of Airport Express Base Stations. The one place that lacked good coverage was the pool house. Without getting into the specifics, I finally figured out a second Airport Express setup as an extender off another Airport Express that was already acting as an extender (i.e. Airport Extreme > Airport Express > Airport Express), really degrades the bandwidth down to even below optimum dial-up speeds.
Moral of the story, the right tools always gets the job done better. To that end, I recently got a recommendation from the This Week in Enterprise Tech podcast about this company that does some good work with equipment that might have helped in my project I just mentioned. It's called MikroTik (http://mikrotik.com/). Next time I need something more than consumer-level gear, I'll take a look at these guys.
However, even home and small-office users, sometimes have very specific situations that require some higher quality equipment that provide specific functionality. Case in point, I once tried to help someone setup a wireless network in a 2500+ square foot home. I had recommended using Apple equipment, since they were mostly a Mac household and the Airport-branded equipment provided most of what they need. My lesson learned from this project was that the Airport Extreme can only accept one additional Airport Express as an extender to the wireless network. Most of the house had coverage after I put in the Airport Extreme and couple of Airport Express Base Stations. The one place that lacked good coverage was the pool house. Without getting into the specifics, I finally figured out a second Airport Express setup as an extender off another Airport Express that was already acting as an extender (i.e. Airport Extreme > Airport Express > Airport Express), really degrades the bandwidth down to even below optimum dial-up speeds.
Moral of the story, the right tools always gets the job done better. To that end, I recently got a recommendation from the This Week in Enterprise Tech podcast about this company that does some good work with equipment that might have helped in my project I just mentioned. It's called MikroTik (http://mikrotik.com/). Next time I need something more than consumer-level gear, I'll take a look at these guys.
Wednesday, May 08, 2013
TIPS & TRICKS: Software Recommendations
My list of software to try to make my own life more efficient. Reminder: Automate repetitive tasks. Don't get too caught up in the automation itself.
OS X:
- CheatSheet - Free app that summarizes the keyboard shortcuts available for the current application. http://www.cheatsheetapp.com/CheatSheet/
iOS:
- Drafts - Paid note taking app heard about on Mac Power Users podcast. Useful for starting email messages, text messages, reminders, etc. http://agiletortoise.com/drafts/
Friday, April 19, 2013
TIPS & TRICKS: Improve the Security of a New Computer
Often, I field questions about how to protect a computer, especially when it's brand new. I've often given customized advice to people, depending on their current environment. But, I get the questions enough that I considered composing a document that outlines this information.
Fortunately, I have (and, so have you) paid for someone else to compose this document for us:
http://www.us-cert.gov/security-publications/ten-ways-improve-security-new-computer
This federal government site has a wealth of information, including this well-written document, on how to secure your computer from the bad guys. There's lots of ways to protect your new computer from getting compromised, but this document provides a great baseline for everyone to follow.
Besides the steps outlined in this document, I would also add that setting up a new machine is a perfect time to also setup a solid backup solution and consider encrypting the hard drive in your computer, especially if it's a notebook that gets lots of miles.
Fortunately, I have (and, so have you) paid for someone else to compose this document for us:
http://www.us-cert.gov/security-publications/ten-ways-improve-security-new-computer
This federal government site has a wealth of information, including this well-written document, on how to secure your computer from the bad guys. There's lots of ways to protect your new computer from getting compromised, but this document provides a great baseline for everyone to follow.
Besides the steps outlined in this document, I would also add that setting up a new machine is a perfect time to also setup a solid backup solution and consider encrypting the hard drive in your computer, especially if it's a notebook that gets lots of miles.
Wednesday, March 20, 2013
TIPS & TRICKS: Browser and Other Security Tests
With all the recent 0-day exploits and other vulnerabilities making news, I thought it would be helpful to have some resources to test out your environment.
First, browser security checks:
Next, router and computer security checks:
As always, security is like an onion. A well secured computing environment will have lots of layers. These tools are another layer of protection.
First, browser security checks:
Next, router and computer security checks:
- Use ShieldsUP! and the Instant UPnP Exposure Test at this site: https://www.grc.com/
As always, security is like an onion. A well secured computing environment will have lots of layers. These tools are another layer of protection.
Sunday, March 10, 2013
TIPS & TRICKS: Viewing Hidden Files in OS X
Initially, I wanted to find a way to transfer music off an old iPod that hadn't been synced to anything for a long time. I have done this many times with a Windows machine and even told people that it's possible to do it on a Mac (OS X). However, I've never actually done it myself.
The basic process is the same on OS X as it is on Windows. Use the OS explorer window to navigate the iPod after making sure that hidden files are visible. On OS X, this is the secret sauce:
A follow-up tip to this one is how to make a hidden folder into a non-hidden folder once it's made visible and to recursively make all subfolders unhidden:
The basic process is the same on OS X as it is on Windows. Use the OS explorer window to navigate the iPod after making sure that hidden files are visible. On OS X, this is the secret sauce:
- Launch Terminal, located at /Applications/Utilities.
- Type or copy/paste the following two commands into the Terminal window, next to the Terminal prompt. Press the return or enter key after you enter each line.
- defaults write com.apple.finder AppleShowAllFiles TRUE
- killall Finder
- If you ever want to make the hidden folders disappear again, just run the code again, but change TRUE to FALSE.
Making hidden files visible in the operating system can be useful for other troubleshooting and modification steps.
A follow-up tip to this one is how to make a hidden folder into a non-hidden folder once it's made visible and to recursively make all subfolders unhidden:
- Using the same terminal window, drag the folder or file into the terminal window. This will put the correct path to the file/folder that needs to be changed to unhidden.
- Using the arrows on the keyboard, backspace to the beginning of the path and type in:
- chflags -R nohidden
- This should give a command that looks something like:
- chflags -R nohidden /Users/username/Desktop/FolderName
- Follow-up the successful command with a:
- killall Finder
Wednesday, January 09, 2013
TIPS & TRICKS: AppleCare Support Page
Been administering Macs for quite some time. In the past, to view all the machines I manage under one Apple ID I used this page:
http://www.apple.com/support/applecare/view
However, today I learned about a tool I had not encountered before:
http://supportprofile.apple.com
This page is different than the page I've used in the past. It also seems to give me more information than than the old page and more ways to manage the information.
One important note to mention is these two sites are two completely different sites. Information on one site does not necessarily show up on the other as I found out in attempting to register a custom MacBook Air with Auto-Enrolled AppleCare that was purchased from an Apple Authorized Reseller. I had to get on the phone with AppleCare Agreement Administration in order to address this disparity. I assume Apple is in a transition between these two sites. Until they get past the transition, I would recommend making sure that the information for all your machines show up in both areas.
Hope this helps you. Happy computing.
http://www.apple.com/support/applecare/view
However, today I learned about a tool I had not encountered before:
http://supportprofile.apple.com
This page is different than the page I've used in the past. It also seems to give me more information than than the old page and more ways to manage the information.
One important note to mention is these two sites are two completely different sites. Information on one site does not necessarily show up on the other as I found out in attempting to register a custom MacBook Air with Auto-Enrolled AppleCare that was purchased from an Apple Authorized Reseller. I had to get on the phone with AppleCare Agreement Administration in order to address this disparity. I assume Apple is in a transition between these two sites. Until they get past the transition, I would recommend making sure that the information for all your machines show up in both areas.
Hope this helps you. Happy computing.
Monday, January 07, 2013
TIPS & TRICKS: Free E-Books for Windows Administrators
There's a lot of free information out there. I always figured if I really wanted to learn something, I didn't necessarily need to go to school for it. Don't get me wrong, the structure of school is something that I require to streamline my learning. However, the information can, often times, be found for free in our information age.
As a systems administrator, part of my job is to keep learning and staying abreast of the latest technology. As a frugal individual, I strive to find the free stuff that works for me (not all free stuff holds value for me). I did come across this site that has free e-books on topics that are relevant to my role as a systems administrator:
http://4sysops.com/archives/free-e-books-for-windows-administrators/
Hope this helps you too in the quest for free, yet valuable information...
http://4sysops.com/archives/free-e-books-for-windows-administrators/
Hope this helps you too in the quest for free, yet valuable information...
Tuesday, December 18, 2012
TIPS & TRICKS: Download Dell OS Media
So the other day, I was helping someone reload their Dell machine. The media to reinstall Windows was not available. I contacted Dell to see if they could send another set. They agreed, but I needed to get this machine back up and running sooner. At some point, I thought to myself how great it would be if I could just download the media and create my own bootable media set. Eventually, I found the original set that came with the computer and got it reloaded.
However, I came across this site that does allow downloading of software to create bootable media. Fortunately, it's a Dell site, which redirects to Digital River, also a trustworthy site.
http://en.community.dell.com/support-forums/software-os/w/microsoft_os/1439.02-microsoft-windows-and-microsoft-office-downloads.aspx
Hope this helps. Happy Computing.
Tuesday, November 06, 2012
TIPS & TRICKS: Manually Change Time Machine Backup Schedule
Apple's Time Machine was, by far, the best tool Apple introduced with OS X Leopard (10.5). Backups are always the last thing most users think about. But, it's the first thing people wish they would have had when there's some failure that prevents them from accessing their data. Time Machine's simplicity should have every single person who doesn't already have a backup solution adopt it with fervor.
As great as the tool is for most backup needs, I have discovered a drawback. Time Machine runs a backup once an hour. The constant barrage of data hitting the backup destination can put a toll on the media. In many cases, the media is an external hard drive with physical hard drive. The drives themselves are not nearly as sturdy as they used to be. I've come across users who have had to replace their backup drives inside of 6 months. If you need the once an hour backup interval, then you'll need to put up with this routine maintenance. Think of it as changing the oil filter every time you change your oil in the car.
Fortunately, there is a fix for those people who don't need the backups nearly that frequently. As the saying goes, there's an app for this. However, I am an fan of understanding how the underlying code works. The manual method is this command (all one line):
The 14400 is the number of seconds in 4 hours. The number you choose should be a factor of 3600 seconds (1 hour). For example if you want to do it once every 7 days, you would use 604800. You can also check the change with this command:
Hope this helps you out with extending the life of that backup hard drive.
As great as the tool is for most backup needs, I have discovered a drawback. Time Machine runs a backup once an hour. The constant barrage of data hitting the backup destination can put a toll on the media. In many cases, the media is an external hard drive with physical hard drive. The drives themselves are not nearly as sturdy as they used to be. I've come across users who have had to replace their backup drives inside of 6 months. If you need the once an hour backup interval, then you'll need to put up with this routine maintenance. Think of it as changing the oil filter every time you change your oil in the car.
Fortunately, there is a fix for those people who don't need the backups nearly that frequently. As the saying goes, there's an app for this. However, I am an fan of understanding how the underlying code works. The manual method is this command (all one line):
sudo defaults write /System/Library/LaunchDaemons/com.apple.backupd-auto StartInterval -int 14400The 14400 is the number of seconds in 4 hours. The number you choose should be a factor of 3600 seconds (1 hour). For example if you want to do it once every 7 days, you would use 604800. You can also check the change with this command:
sudo defaults read /System/Library/LaunchDaemons/com.apple.backupd-auto StartIntervalHope this helps you out with extending the life of that backup hard drive.
Friday, October 26, 2012
TIPS & TRICKS: iPhone Syncing Error
Syncing my iPhone with iTunes on my workstation yielded an error message that said "The iPhone cannot be synced. An unexpected error occurred (1150)." The only way I could figure out a way around this error was to disable all restrictions on the iPhone itself. I tried disabling individual restrictions, but nothing worked. Only completely disabling all restrictions helped the sync complete.
Oh, it also helps to unplug the sync cable if you have it plugged in after disabling all restrictions. Unplugging and replugging the iPhone to the computer seems to tell iTunes that changes were actually made.
Hope that helps you.
Oh, it also helps to unplug the sync cable if you have it plugged in after disabling all restrictions. Unplugging and replugging the iPhone to the computer seems to tell iTunes that changes were actually made.
Hope that helps you.
Wednesday, October 17, 2012
TIPS & TRICKS: Force Facebook to Clear Page Cache
To be clear, this tool really refreshes Facebook's cache of a particular page. In addition, this tool doesn't clear any caches in Facebook pages. Rather, it checks third party pages for updated content.
https://developers.facebook.com/tools/debug
I came across this while posting a status update with a link on a Page I manage. The link's preview showed some outdated information, which I knew had been updated already. Using this developer tool helped to update the cache to show the current information on the link preview.
https://developers.facebook.com/tools/debug
I came across this while posting a status update with a link on a Page I manage. The link's preview showed some outdated information, which I knew had been updated already. Using this developer tool helped to update the cache to show the current information on the link preview.
Monday, September 24, 2012
TIPS & TRICKS: Microsoft Group Policy Settings Spreadsheet
Group policy can be daunting. I'm sure I've shared other people's frustrations when just simply looking for a particular setting. There's been countless times when I wished I could just do a search on the whereabouts of a particular setting. At least, these spreadsheets are searchable:
http://www.microsoft.com/en-us/download/details.aspx?id=25250
http://www.microsoft.com/en-us/download/details.aspx?id=25250
Tuesday, September 11, 2012
RANTS & RAVES: Fingerprint Reader Software by UPEK
I have my reservations about fingerprint readers. This article about how the UPEK software stores a users passwords in a very insecure way, serves to make me more wary about anything that stores passwords.
http://blog.crackpassword.com/2012/08/upek-fingerprint-readers-a-huge-security-hole/
Fortunately, the silver lining I'm pulling out of this story rests with the great advantage of using disk encryption such as BitLocker. If the disk is encrypted, then the not so securely stored password for the fingerprint reader turns out the encrypted just by virtue of being stored on the same disk. If you've got multiple drives or volumes, then make sure that the separate drives are encrypted too.
Lesson learned before I get into any trouble.
http://blog.crackpassword.com/2012/08/upek-fingerprint-readers-a-huge-security-hole/
Fortunately, the silver lining I'm pulling out of this story rests with the great advantage of using disk encryption such as BitLocker. If the disk is encrypted, then the not so securely stored password for the fingerprint reader turns out the encrypted just by virtue of being stored on the same disk. If you've got multiple drives or volumes, then make sure that the separate drives are encrypted too.
Lesson learned before I get into any trouble.
TIPS & TRICKS: Active Directory Users & Computers Filtering
Handy little LDAP query to filter users who have not changed passwords after a certain date (in this case, September 5th) (all one line):
Here are the steps to run the filter:
(&(objectCategory=user)(pwdLastSet>=129913020000000000)(!(userAccountControl:1.2.840.113556.1.4.803:=2)))
Here are the steps to run the filter:
- In ADUC, click on Set Filtering options icon
- click "Create custom", then Customize button
- click on Advanced tab, then enter (or copy/paste) LDAP query:
- (&(objectCategory=user)(pwdLastSet>=129913020000000000)(!(userAccountControl:1.2.840.113556.1.4.803:=2)))
- then click OK button, then OK again to close Filter Options
- In OU list at left, navigate to your OU, which will now show only users who have changed password since cutoff time.
- 129913020000000000 = number of 100 nanosecond intervals since Jan 1, 1601 to 9/5/2012 12:00 AM.
- (!(userAccountControl:1.2.840.113556.1.4.803:=2)) is a bitwise operation to exclude disabled users.
- If you want to return to seeing all users and objects, you need to clear the filter, by clicking on Set Filtering options icon, then click "Show all types of objects"
- You can reverse the query to see users who haven't changed password yet, by changing the query string >= to <=
Monday, April 23, 2012
TIPS & TRICKS: Recalibrate a Sticky iPhone Home Button
Didn't know about this trick until today. Apparently, if the home button on the iPhone is sticking or not responding, recalibrating it could help to get it working again. Here are the steps:
- Click on a native iOS application (i.e. Stocks, Email, Messages, etc.).
- Push and hold the power button on top until the "slide to power off" screen appears.
- Let go of the power button.
- Push and hold the home button until the "slide to power off" screen disappears and let go of the home button.
The home button should be recalibrated now.
Hope this helps someone.
Subscribe to:
Posts (Atom)